Hello everyone, Merry here from Merry Meadows Farm. It’s a pleasure to have you with me today. If you’re like me, you appreciate the simple and wholesome things in life—clean air, fresh produce, and skin-care products that you can trust. That’s why making soap at home has always been close to my heart.
When you make your own soap, you get to choose what goes into it. And one ingredient I swear by is raw goat milk. Packed with essential nutrients, it’s a real game changer for your skin. It moisturizes, soothes, and adds a touch of luxury to your everyday routine.
So, I thought it was about time to share my step-by-step guide on how to create your own handmade soap using our very own raw goat milk. We’ll cover everything from gathering your materials to the safety measures you should follow, plus a few handy tips I’ve gathered over the years.
Ready to get started? Let’s dive right in!
Why Use Raw Goat Milk in Soap?
Now, you might be wondering, “Why all the fuss about raw goat milk?” Trust me, once you’ve tried it, you won’t go back. Here’s why:
Nutritional Content and Benefits for the Skin
Goat milk is like a nutrient-packed smoothie for your skin. It’s rich in vitamins like A, D, and B6, not to mention minerals like selenium. These aren’t just fancy names; these nutrients really work wonders. Vitamin A promotes healthy skin, Vitamin D is a natural antioxidant, and selenium fights off those pesky skin-damaging free radicals.
And let’s not forget fatty acids. These little wonders keep your skin moisturized and hydrated, making you feel as if you’ve just stepped out of a spa.
The Creamy Texture It Provides
Have you ever noticed how some soaps leave your skin feeling dry and almost squeaky? Well, goat milk soap does just the opposite. Thanks to its creamy texture, it leaves your skin feeling smooth, rich, and wonderfully moisturized. It’s like a touch of luxury in your daily routine.
Hypoallergenic Properties
One of the best things about goat milk is its gentle nature. It’s hypoallergenic, which means it’s kind to all skin types. Whether you’ve got skin as tough as an old boot or as delicate as a daisy, this soap is for you. It’s especially good for folks with sensitive skin, eczema, or psoriasis.
So there you have it. Raw goat milk isn’t just a trendy ingredient; it’s a tried-and-true addition that brings a whole lot of goodness to your soap—and to your skin.
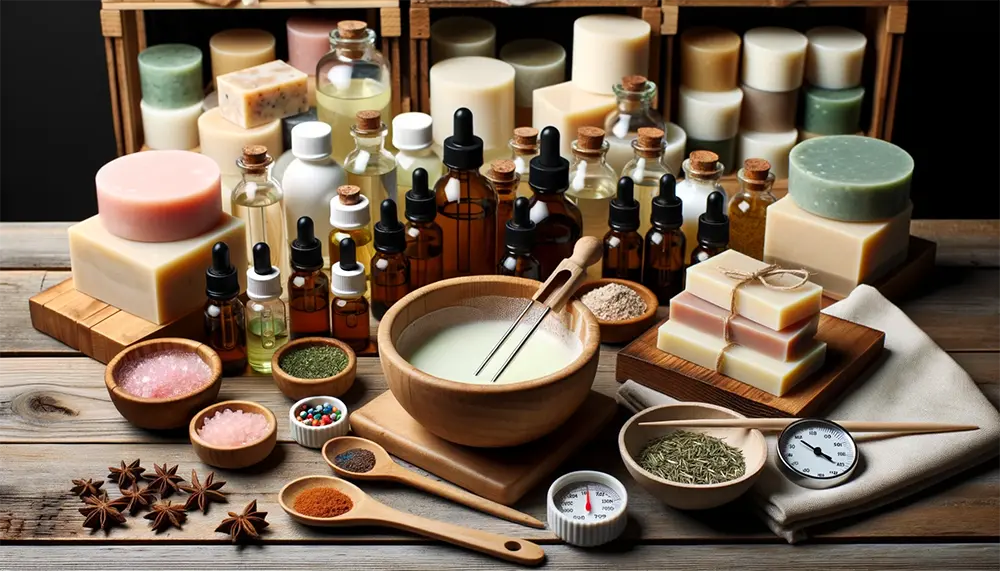
Materials Needed
Before we dive into the soap-making process, it’s crucial to gather all the necessary materials. Each ingredient and piece of equipment plays a vital role in crafting the perfect bar of soap. Let’s go over them in detail.
List of Ingredients
- Raw Goat Milk: The main ingredient that sets this soap apart. Goat milk is rich in fatty acids and nutrients, which nourish the skin. Make sure it’s raw and fresh for the best quality.
- Lye (Sodium Hydroxide): This is the saponifying agent that transforms oils into soap. It’s important to use 100% sodium hydroxide lye, and to handle it with care, as it’s caustic.
- Oils: Quality oils are essential for a good soap.
- Olive Oil: Great for moisturizing and offers a gentle cleanse.
- Coconut Oil: Produces a hard bar with a fluffy lather.
- Essential Oils: These give your soap a natural fragrance. Some popular choices include:
- Lavender: Calming and antibacterial.
- Tea Tree: Antiseptic and invigorating.
- Colorants: Optional, but they add visual appeal to your soap.
- Natural Options: Turmeric for yellow, beetroot powder for pink, or spirulina for green.
List of Equipment
- Soap Molds: Silicone molds work best as they make it easier to remove the soap once it’s set. You can also use wooden molds lined with parchment paper.
- Mixing Bowls: Stainless steel or glass bowls are recommended. Avoid using aluminum as it reacts with lye.
- Measuring Cups: Accurate measurements are key, so make sure to use a set of measuring cups specifically for soap-making.
- Safety Gear: Safety is paramount when working with caustic substances like lye.
- Gloves: Nitrile or rubber gloves to protect your hands.
- Goggles: To safeguard your eyes from any splashes.
By ensuring you have all of these materials ready and understood, you’re setting yourself up for a successful soap-making session.
Safety Precautions
Before we get all excited and start mixing things together, let’s have a serious chat about safety. When you’re crafting something as lovely as homemade soap, it’s easy to forget you’re also working with some strong chemicals. So, let’s make sure we do this the right way—safely and carefully.
The Importance of Safety When Handling Lye
Lye, or sodium hydroxide, is a crucial ingredient in soap-making, but it’s also a caustic substance. That means it can burn your skin or eyes upon contact and produce harmful fumes. Therefore, it’s critical to handle it with the utmost care. Always add lye to water—not the other way around—to prevent a volatile reaction. Keep pets and children away from your soap-making area, especially when working with lye.
Recommended Safety Gear
- Gloves: Always wear a pair of nitrile or rubber gloves to protect your hands from any accidental spills or splashes.
- Goggles: Eye protection is just as important. A pair of safety goggles will help shield your eyes from splashes.
- Long-Sleeved Shirt: To protect your arms, it’s a good idea to wear a long-sleeved shirt you don’t mind getting a bit dirty.
- Closed-Toe Shoes: Drops and spills can happen, so make sure your feet are well-protected.
A Well-Ventilated Work Area
Proper ventilation is a must when working with lye, as it can emit fumes that shouldn’t be inhaled. Make sure to work in a well-ventilated area, ideally near an open window or an exhaust fan. Some soap-makers even prefer to work outdoors for this part of the process.
By taking these safety precautions seriously, you’re ensuring a safer and more enjoyable soap-making experience. Trust me, your skin and eyes will thank you!
Step-by-Step Guide
Crafting soap is a bit like baking; you need to follow each step carefully for the end product to turn out just right. Let’s start from the beginning.
Step 1: Prepare the Goat Milk
How to Source Raw Goat Milk
First things first, you’ll need some high-quality raw goat milk. The best source, of course, is fresh from the farm. If you’re near us at Merry Meadows, feel free to stop by for some of the freshest goat milk around. If not, look for local farms or health food stores that sell raw, unpasteurized goat milk. Make sure it’s free from additives and preservatives for the best results.
How to Prepare the Goat Milk
- Measure the Milk: Accurate measurements are crucial. Use a kitchen scale for the most precise measurement, and pour the needed amount into a stainless steel or glass bowl.
- Freeze the Milk: This is a tip I’ve picked up over the years. Freezing the goat milk into cubes makes it easier to mix with lye later on, reducing the chance of it scalding.
- Thaw Partially: Before you start the soap-making process, let the frozen goat milk cubes thaw to a slushy consistency. This ensures a smooth mixing process when combining it with lye.
By sourcing high-quality raw goat milk and preparing it correctly, you’re laying down a strong foundation for your soap. It’s the little details like this that can make all the difference.
Step 2: Measure Ingredients
Getting the measurements right is not just a good practice; it’s a must in soap-making. Incorrect ratios can lead to a batch that doesn’t set properly or, even worse, could be irritating to the skin. Here’s how to measure each ingredient accurately:
Measuring Goat Milk
You’ve already measured and prepared your goat milk in Step 1. Make sure you know the exact amount, as you’ll need this information to calculate the quantity of lye and oils required.
Measuring Lye
- Use a Scale: Always use a reliable kitchen scale for measuring lye. This ensures that you have the exact amount needed for saponification—the chemical reaction that turns oils and lye into soap.
- Safety Note: Make sure you’re wearing your gloves and goggles while handling lye.
Measuring Oils
- Individual Oils: Measure each type of oil separately. Different oils have different densities, so measuring them individually is essential for an accurate ratio.
- Use a Pouring Jug: A pouring jug with measurement markings can be a real lifesaver when you’re measuring oils. It’s much easier to pour from a jug into your mixing bowl than from a bottle.
Measuring Essential Oils and Colorants
- Dropper or Pipette: For essential oils, use a dropper or pipette for precise measurements. Essential oils can be potent, so a little goes a long way.
- Spoons for Colorants: If you’re using solid colorants like powders, use measuring spoons to get the exact amount. Liquid colorants can be measured using a dropper.
By taking the time to measure each ingredient accurately, you’re setting the stage for a smooth and successful soap-making process. It’s one of those steps where attention to detail really pays off.
Step 3: Mix Lye and Goat Milk
Now, this is where the magic starts to happen. Combining lye and goat milk initiates the saponification process, turning these raw materials into soap. But remember, this step needs to be executed with caution and precision.
The Process of Adding Lye to Goat Milk
- Prepare Your Area: Make sure your workspace is clean and that you have your safety gear on. Lay down some newspaper or plastic sheeting for easy clean-up in case of spills.
- Get Your Milk Ready: Take your partially-thawed goat milk cubes (from Step 1) and place them in a heat-resistant glass or stainless steel bowl.
- Slowly Add the Lye: This is crucial—always add the lye to the milk, not the other way around. Sprinkle the lye slowly over the goat milk cubes, stirring gently but continuously.
- Monitor the Temperature: Use a thermometer to keep track of the mixture’s temperature. Aim to keep it below 110°F to prevent the milk from scalding.
- Stir Until Dissolved: Continue stirring until the lye is completely dissolved in the goat milk. The mixture should become a consistent, creamy liquid.
Safety Precautions Specific to This Step
- Ventilation: As mentioned before, make sure you’re working in a well-ventilated area, especially because mixing lye and liquid can release fumes.
- Protective Gear: You should already be wearing your safety goggles and gloves, but double-check to make sure they’re on securely.
- Slow and Steady: Never rush this step. Adding lye too quickly can cause a violent reaction or produce undesirable chunks in your soap.
- No Distractions: Keep pets and children far away from your work area during this sensitive stage.
- Emergency Precautions: Have a bottle of white vinegar handy. In case of skin contact with the lye, vinegar will neutralize the alkaline burn. However, seek medical attention for any serious burns.
By being meticulous and cautious, you’re ensuring that the lye and goat milk mix together safely and effectively, setting the stage for a successful batch of homemade soap.
Step 4: Prepare Oils
Once you’ve safely mixed your lye and goat milk, it’s time to turn our attention to the oils. The oils provide the moisturizing properties of the soap, and different oils bring different qualities to the final product.
Melting Oils
- Weigh Each Oil: If you haven’t already, weigh each type of oil separately using a kitchen scale to ensure precise measurements.
- Use a Double Boiler: The best way to melt oils without overheating them is to use a double boiler. If you don’t have one, you can make your own by placing a heat-resistant bowl over a pot of simmering water.
- Add Oils to the Bowl: Place the weighed oils in the upper part of the double boiler or your makeshift version.
- Monitor the Temperature: Use a thermometer to keep an eye on the oil temperature. You’ll want to melt the oils until they reach a temperature of around 100-110°F.
Mixing Oils
- Combine Melted Oils: Once all the oils are melted and have reached the desired temperature, carefully pour them into a large mixing bowl.
- Stir Gently: Use a spatula or a hand blender on the lowest setting to mix the oils together until well combined.
- Temperature Check: Make sure the oils and the lye-milk mixture are close in temperature to each other. This helps to ensure a smooth mixing process in the next step.
Preparing your oils correctly is crucial for the quality of your soap. The right oils make your soap not just cleansing, but also nourishing for the skin. It’s these small steps that make a big difference in the end product.
Step 5: Combine Ingredients
After meticulously preparing each component, it’s finally time to bring them all together. This is where your soap starts to take shape, both in texture and aroma.
Combining the Lye-Milk Mixture with Oils
- Check Temperatures: Before mixing, double-check that the lye-milk mixture and the oils are close in temperature, ideally between 100-110°F. This ensures a smoother blending process.
- Slow Pour: Carefully pour the lye-milk mixture into the bowl of melted oils while gently stirring.
- Initial Mixing: Use a hand blender on a low setting to start blending the lye-milk mixture with the oils. You’ll notice the texture starting to change, becoming thicker and more consistent.
- Look for Trace: “Trace” is the soap-making term for the point when oils and lye have emulsified. You’ll know you’ve reached trace when your mixture thickens to the consistency of a light pudding.
Adding Essential Oils and Colorants
- Measure Your Additives: If you haven’t already, measure out your essential oils and colorants. Always adhere to recommended usage rates for each.
- Add Essential Oils: Once you’ve reached trace, add your chosen essential oils to the mixture. Blend them in thoroughly for an even scent.
- Add Colorants: If you’re using colorants, now’s the time to add them. Sprinkle in your chosen colorant and mix until you reach your desired hue.
- Final Stir: Give everything one final stir to make sure all the ingredients are well combined.
And there you have it! Your soap mixture is now ready for molding. It’s amazing to think that these individual ingredients have come together to create something so useful and beautiful.
Step 6: Pour into Molds
You’re almost there! After all the measuring, mixing, and stirring, it’s time to pour the soap mixture into molds. This step is both satisfying and crucial, as the way you pour can affect the final appearance of your soap.
Pouring the Mixture into Soap Molds
- Prepare the Molds: If you’re using silicone molds, they’re generally non-stick, but if you have wooden molds, line them with parchment paper for easy soap removal later.
- Slow and Steady: Using a ladle or a large spoon, carefully pour the soap mixture into your prepared molds. The key is to pour slowly to ensure an even fill.
- Level the Surface: Use a spatula to smooth out the top of the soap, leveling it for a neat appearance.
Tips for Avoiding Air Bubbles
- Tap and Shake: After pouring, gently tap the molds on the counter or shake them slightly to help any trapped air bubbles rise to the surface.
- Puncture Bubbles: If you see any visible air bubbles, you can use a toothpick or a small skewer to puncture them.
- Light Spritz: Some soap-makers like to spritz the top of the poured soap with rubbing alcohol. This can help break the surface tension and eliminate tiny bubbles.
- Double Check: Before moving on to the curing process, give your molds a final check to make sure there are no remaining air bubbles that could mar the soap’s final look.
Pouring into molds might seem straightforward, but a careful approach can make the difference between a good batch of soap and a great one. Attention to detail at this stage pays off when you finally get to use your homemade soap.
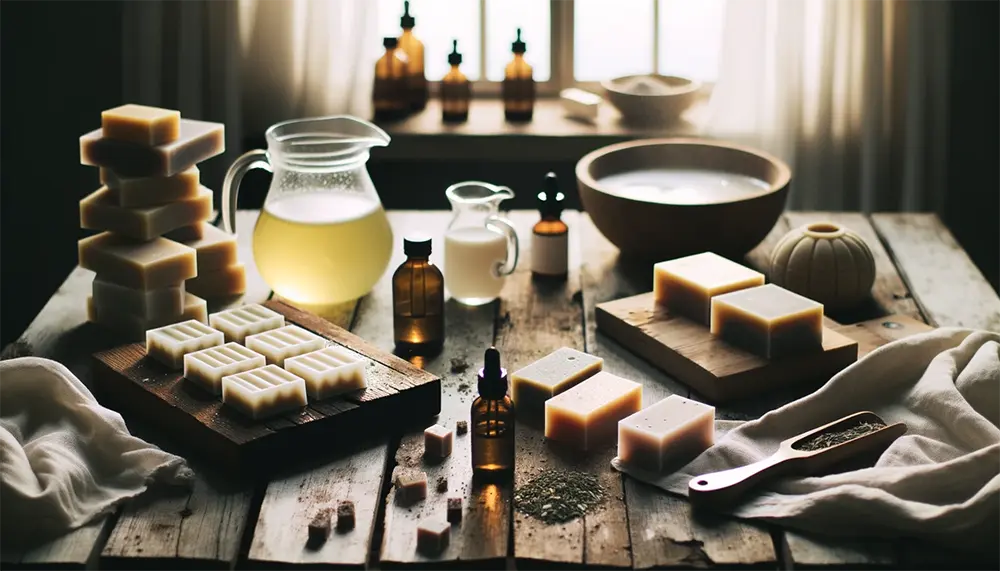
Step 7: Let it Cure
You’ve done the hard work, and now it’s time to let time and chemistry finish the job. Curing is essential for the soap to achieve its best quality in both performance and longevity.
How Long to Let the Soap Cure
- Initial Set: Allow the soap to remain in the molds for at least 24 to 48 hours. This initial setting time makes it easier to remove the soap from the molds without damaging its shape.
- Full Cure: After unmolding, the soap needs to cure for 4 to 6 weeks. This allows the water content to evaporate, resulting in a harder and longer-lasting bar of soap.
Where to Store the Soap While Curing
- Cool, Dry Place: The best place to cure soap is in a cool, dry area away from direct sunlight and extreme temperatures.
- Air Circulation: Make sure there’s good air circulation around each bar to facilitate even drying. Some people use wire racks for this purpose.
- Spacing: If you’re curing multiple bars, make sure to leave some space between them for better air circulation.
- Label and Date: It’s a good idea to label each bar or batch with the date it was made. This way, you can track its curing time easily.
- Check Weekly: Check on your soap every week to see how it’s coming along. You can even do a “touch test”—if the soap feels dry to the touch, it’s usually a good sign that it’s curing well.
The wait might be challenging, but it’s well worth it. Curing transforms your soap from a basic homemade item into a high-quality product that you can be proud of. Plus, there’s nothing quite like the satisfaction of using something you’ve made entirely from scratch.
Tips and Tricks
Now that you’ve got the basics down, here are some extra tips and tricks to enhance your soap-making journey. Because let’s be honest, once you start, it’s hard to stop!
Additional Tips for Enhancing the Quality of the Soap
- Superfatting: This technique involves adding a little extra oil to your recipe, which remains unsaponified. The result is a more moisturizing soap. A common superfatting level is around 5%.
- Temperature Control: Keeping a consistent temperature throughout the soap-making process can help prevent issues like separation or “soap volcanoes.” A kitchen thermometer is your best friend here.
- pH Testing: After your soap has cured, it’s a good idea to test its pH level. A pH of around 9-10 is ideal for soap. You can use pH testing strips for this.
- Quality Ingredients: Always choose the best quality oils and additives you can afford. Organic and cold-pressed oils often offer superior quality.
Ideas for Customizing Scent and Color
- Blending Essential Oils: Don’t be afraid to blend different essential oils to create a unique scent profile. For instance, lavender pairs well with citrus oils for a refreshing and calming aroma.
- Seasonal Scents: Consider making seasonal variations of your soap with holiday-inspired scents like cinnamon and orange for fall, or peppermint for winter.
- Natural Colorants: If you want to steer clear of artificial dyes, consider using natural colorants like spinach powder for green, cocoa powder for brown, or annatto seeds for orange.
- Swirls and Layers: For a more artistic touch, try techniques like swirling two or more colors together, or layering different colored soap mixtures.
- Add-Ins: For texture and visual appeal, consider adding ingredients like oatmeal for exfoliation, or flower petals for a touch of elegance.
Remember, soap-making is as much an art as it is a science. Feel free to experiment, make mistakes, and most importantly, have fun. The best soap is the one that makes you happy—not just clean!
Goat’s Milk Soap Making Conclusion
Well, there you have it, folks! A comprehensive guide to making your very own raw goat milk soap, right from the comfort of your home. Trust me, once you’ve tried homemade soap, you’ll wonder why you ever settled for store-bought.
The Benefits Recap
Let’s quickly revisit why this soap is worth the effort:
- Nutrient-Rich: The vitamins and fatty acids in raw goat milk nourish your skin, leaving it soft and hydrated.
- Customizable: Making your own soap means you get to choose the scent, color, and even texture. Your soap, your rules!
- Hypoallergenic: This soap is gentle on the skin, making it ideal for those with sensitivities or skin conditions.
- Quality Control: You know exactly what’s going into your soap—no more unpronounceable ingredients on the label!
Give it a Try!
So, why not give it a shot? Whether you’re looking to ditch the chemicals in commercial soaps, or you’re just in the mood for a fun and rewarding DIY project, soap-making has something to offer everyone. And who knows? You might just discover a new lifelong passion.
Thanks for spending time with me today, and I can’t wait to hear about your soap-making adventures. Happy crafting!
